 inspect
We have lift off 🚀: building a gemini server in python
7 years after its invention, I discovered the Gemini protocol. It’s a kind of “back to first principals” alternative to the web, aimed at providing value to independent content creators away from the noise, bots and trackers of the main web.
Imagine the web if HTTP had no cookies, or even any headers or methods apart
from GET. If HTML could not add scripting, styling or fetch further resources
(no <link>, <script> or even <img>, <audio> tags. No text decoration
apart from headings and lists existed. Where TLS did not require a trusted 3rd
party Certificate Authority (CA) to approve of every party. This minimalism may
sound very basic and even useless to many applications, but the result is a
community of writers and developers focused on creating and sharing content
without a commercial aim behind it, no influencers, no bots, no e-commerce, no
subscriptions.
In Gemini, a website is called a capsule, the web is called the geminispace. The standard document format is kind of stripped down markdown format called gemtext (Gemini’s HTML equivalent). To surf the geminispace, you need a Gemini client (equivalent of a web browser). After trying a few options such as deedum, I found the Lagrange client, an amazing piece of software written by Jaakko Keränen @skyjake who works for Nokia. The client works on all platforms (mobile and desktop) and is a real pleasure to use.
There are no big corporations on Gemini. Lagrange comes with a bookmark to a “Getting started” page which lists some search engines like keneddy which I understand runs entirely on one guy’s mac mini including the crawler.
After exploring the geminispace a little, I wanted to have a go at implementing my own server. It may not be the ideal language to implement a server, but I’m doing an increasing amount of python development so it seemed like a fun project to use it on. The rest of this post follows a similar step by step process that I went through to implement a Gemini server in python trying to use minimal external dependencies.
Listening on a TCP socket
The first thing to do was to create a TCP socket to listen on the Gemini port (which is 1965, the year of the Gemini 5 rocket launch). To do this we do
import socket as Socket

port = 1965
socket = Socket.socket(Socket.AF_INET, Socket.SOCK_STREAM, 0)
socket.setsockopt(Socket.SOL_SOCKET, Socket.SO_REUSEADDR, 1)
socket.bind(('0.0.0.0', port))
socket.listen(5)
while True:
    connection, client_address = socket.accept()
    connection.sendall(b'hello')
These are quite low level APIs that wrap OS system calls, let’s explain some some of them.
socket
Socket.AF_INETinstructs our socket to allow connections from IPv4 addressesSocket.SOCK_STREAMmeans listen on the TCP protocol.
We bind the socket to 0.0.0.0 which is a special address to indicate we want
to listen on all network interfaces. You could also use 127.0.0.1, but
this causes problems when running inside a docker container for example.
setsockopt
- SOL_SOCKET indicates that we are setting an option at the sockets api level (it is also possible to set options at the TCP protocol level for example).
- SO_REUSEADDR option on the tells the operating system that it can bind the socket except if there is already an active socket listening on that address and port. Without this I found that if I terminated and restarted my program, I was not able to immediately bind the socket again.
Testing your TCP socket
If you run the code outlined above, you can test out your server by using a TCP
client. I recommend either using telnet or nc as it is likely that you
already have them installed. Run the python script and then in another terminal
window one of these.
nc 0.0.0.0 1965
telnet 0.0.0.0 1965
If all is working properly, you should see hello printed.
Exchanging valid Gemini requests and responses
Currently, we’re only returning hello from our socket server. In order to
return
a valid Gemini response,
We need to return something like
20 text/gemini
# Hello
- 20 is the “success” status code (similar to 200 in HTTP)
text/geminiis the mime type of the response data more on gemtext later- The line below is the actual response data.
A valid Gemini request, always consists of only an absolute URL which cannot
exceed 1024 bytes of data. We can read 1024 bytes from the connection object.
Let’s return Hello if the path is /hello and /goodbye if the path is
/goodbye. We can send a 51 “Not found” for any other case.
from urllib.parse import SplitResult, urlsplit

data = connection.recv(1024)
url = urlsplit(data.split("\r\n")[0])
if url.path  == b"/hello":
    connection.send(b"20 text/gemini\r\n# Hello")
elif url.path  == b"/goodbye":
    connection.send(b"20 text/gemini\r\n# Goodbye")
else:
    connection.send(b"51 Not Found\r\n")
At this point if you re run your test with your TCP client, you should be able to send a URL and observe different responses depending on the path.
Encrypting with TLS
So far, we are sending unencrypted data over our socket (similar to plain HTTP requests). Gemini mandates the use of TLS, so for a Gemini client to understand our request we need to encrypt the data with a TLS certificate.
Unlike on the web, which pretty much mandates that server certificates be issued by a specific set of certificate authorities (CAs), it is quite common in Gemini to use self signed certificates. Gemini operates a “Trust on first use” (TOFU) policy for TLS. This works similar to SSH connections where the first time you connect to a host, your client associates it’s certificate with that host. If the certificate changes for subsequent requests, you will get a TLS error (or warning at least) that the server’s identity has changed.
Let’s generate a self signed certificate to identify our server. To do this
we’ll use the openssl tool which is also likely already installed on your
system.
#!/bin/sh
set -eu

HOST="${1:-my-gemini-host.com}"
DAYS="${2:-365}"

openssl req -x509 -newkey rsa:2048 -nodes -days "$DAYS" \
  -keyout key.pem -out certificate.pem \
  -subj "/CN=$HOST" \
  -addext "subjectAltName=DNS:$HOST,DNS:localhost"

chmod 600 key.pem

openssl x509 -in certificate.pem -noout -subject -ext subjectAltName -dates
This will generate a self signed certificate.pem and key.pem file which we
can use to identify our server to Gemini clients. Using the ssl module, create a
context and load the certificate and key files generated by the previous script.
The ssl lib allows you to wrap an unencrypted TLS socket so that you can use it
in the same way but encrypted. Change your current code to use the wrapped
tls_connection.
import ssl

context = ssl.SSLContext(ssl.PROTOCOL_TLS_SERVER)
context.load_cert_chain("./certificate.pem", "./key.pem")

tls_connection = context.wrap_socket(connection, server_side=True)
Success 🎉, you should now have a server that a real Gemini client will
understand. You should be able to point lagrange (or any other Gemini client) at
gemini://localhost/hello and get a page with a Hello heading returned.
Accepting user input
What we’ve done so far in enough to serve static pages, however there will come a time where you’ll want to accept user input. To indicate that input is required, the server needs to return status 10 which tells the client to prompt the user for input.
This is a lot more basic than what you’re probably used to with HTML forms and HTTP post. You get a single prompt which is then sent to the same URI as the entire query string once the user fills it in. You cannot send multiple query parameters or provide different input types, the user gets a text box with a single field, that’s it.
Let’s add another route to echo back what the user input
elif url.path == b"/echo":
    query = url.query
    if query == b"":
        tls_connection.send(b"10 What should I echo ?\r\n")
    else:
        tls_connection.send(b"20 text/gemini\r\n" + query)
Identifying the user
We can now accept user input from the user, but how do we know which user it came from? In HTTP world there are many ways to do this, basic auth, oauth2 are common but another way is mutual TLS (mTLS). In this scenario, both the server and client present there own TLS certificates. The server can then identify the client based on its certificate.
mTLS is quite commonly used in enterprise applications for machine to machine communication, but not very common for end user applications due to to the fact that generating, maintaining and instructing the browser to use a client TLS certificate is quite complicated and cumbersome for the average user. Certificates expire, the server needs to agree to trust them, etc.
Unlike with HTTP, where TLS was bolted on later with HTTPS, TLS is native to the Gemini protocol. There is a special set of status codes (6X) around client certificates. If a server sends status code 60, it means that the client must provide a client certificate to access this page. As a result, creating and managing client certificates is encouraged to be supported by Gemini clients (the browsers). Lagrange handles this very well. When a server responds with status 60, the user gets prompted to either use a certificate they created previously, or to create a new certificate with a friendly interface that hides away the complexities of TLS. Once the certificate is created, the page can reload, this time using mTLS with the client supplying the newly created certificate.
Gemini’s approach to TLS
Gemini uses TLS in a more simplified way to HTTPS which is not without security trade offs and criticism, but does provide much improved security over unencrypted connections. TLS is used as an asymmetric (public/private key) encryption protocol it is common place in Gemini
- To use self signed certificates rather than certificates issued by certificate authorities (CAs) in favour of a trust on first use (TOFU) approach similar to how SSH uses known hosts.
- To ignore (at least client) certificate expiry dates
These 2 points are where things get difficult with the standard library SSL python module.
The problem is (as far as I could tell) that the ssl module requires the server to be configured to trust the client’s certificate authority upfront before it serves the request. In enterprise / corporate networks this is generally OK as there would likely be conversations upfront to configure the certificate before it was used. This is not practical for a public website (or capsule). With the python ssl module, a certificate generated by an unknown CA will be rejected before we can trust it. This is what led me to use the pyOpenSSL library.
Refactoring to use client certificates using the pyOpenSSL library
The key difference is that it allows you to configure ssl to accept client
certificates and override the certificate verification to supply your own
implementation via the
set_verify
method. By always returning True we can move certificate verification and
reading logic up into the Gemini protocol specific code.
context.set_verify(ssl.VERIFY_PEER, lambda *_: True)
In order to resume TLS sessions with client certificates, we also need to set the session id context otherwise one the first request will work and subsequent requests will be rejected.
context.set_session_id(b"my_gemini_server")
Then later in our “protected route” we can get the certificate and use its information to lookup the user in the existing records or to create a new user.
peer = tls_connection.get_peer_certificate()
cert = peer.to_cryptography()
names = cert.subject.get_attributes_for_oid(NameOID.COMMON_NAME)
common_name = names[0].value
fingerprint = cert.fingerprint(hashes.SHA256()).hex()
The fingerprint in the code above essentially acts as a unique identifier for the certificate. You can create a user and identify them with this value. The common_name is a more friendly name which clients will prompt the user for on creation. You can use this like a user name that is displayed but not to identify them.
Gemini uses status code 60 to indicate to clients that this resource requires a
client certificate. In our protected route, if no peer can be found from
get_peer_certificate() we need to return the 60 status code which tells the
client that it needs to prompt the user to create or use an existing
certificate.
Thankfully migrating to pyOpenSSL isn’t too difficult. Here’s a full example
modified to use pyOpenSSL with client certificates, with a /hello-user route
that responds with the certificates name and fingerprint.
import socket as Socket
from OpenSSL import SSL as ssl
from urllib.parse import SplitResult, urlsplit
from cryptography.x509.oid import NameOID
from cryptography.hazmat.primitives import hashes


port = 1965
context = ssl.Context(ssl.TLS_SERVER_METHOD)
context.use_certificate_file(
    "./certificate.pem"
)
context.use_privatekey_file("./key.pem")
context.set_verify(ssl.VERIFY_PEER, lambda *_: True)
context.set_session_id(b"my_gemini_server")

socket = Socket.socket(Socket.AF_INET, Socket.SOCK_STREAM, 0)
socket.setsockopt(Socket.SOL_SOCKET, Socket.SO_REUSEADDR, 1)
socket.bind(("0.0.0.0", port))
socket.listen(5)
while True:
    connection, client_address = socket.accept()
    tls_connection = ssl.Connection(context, connection)
    tls_connection.set_accept_state()
    tls_connection.do_handshake()
    data = tls_connection.recv(1024)
    url = urlsplit(data.split(b"\r\n")[0])
    if url.path == b"/hello-user":
        peer = tls_connection.get_peer_certificate()
        if peer is None:
            tls_connection.send(b"60 Please authenticate\r\n")
        else:
            cert = peer.to_cryptography()
            names = cert.subject.get_attributes_for_oid(NameOID.COMMON_NAME)
            common_name = names[0].value
            fingerprint = cert.fingerprint(hashes.SHA256()).hex()
            tls_connection.send(
                str.encode(
                    "\r\n".join(
                        (
                            "20 text/gemini",
                            f"# Hello {common_name}",
                            f"## fingerprint",
                            fingerprint,
                        )
                    )
                )
            )

    else:
        tls_connection.send(b"51 Not Found\r\n")
Improving performance with async
What we’ve built so far is a single threaded synchronous server. This means that the server handles one request at a time and cannot accept new connections until the previous request has been dealt with. This works fine when testing on your machine, but will struggle once you have multiple users and your routes are handling more complicated logic and interacting with other systems like databases or third party services. There are several ways to deal with this problem.
- Multithreading - where each new connection starts a new thread to handle the request
- Multiprocessing - similar but spawning a new process (more expensive than a thread)
- async/await - which hands back control to your program while it’s waiting for the operating system to respond to an “I/O task” like opening a file or responding to a network request
The first 2 are parallelism solutions, the second is a concurrency solution. This article explains the subtleties between the 2 better than I can I strongly recommend it. As the article states, concurrency is probably the better choice for I/O bound applications like servers.
In python async/await is handled by the asyncio module. Amongst many other things, asyncio provides a function to start a TCP server using async connection handling. This will replace what we used the socket module for at the very start of this post. Coming from the JavaScript world where everything is async by default it may be a little frustrating that in order to use async await, you may need to rewrite or wrap your code. Going into this in detail perhaps deserves another post but in short pyOpenSSL doesn’t natively support async await so it was necessary to create some wrapper code to interact with it in a non blocking way.
Deployment
After doing all of this we now have a working Gemini server. The next thing to
do is to share it with the world! I wanted to stick to Gemini’s do it yourself
kind of ethos and self host this. I found an old
Raspberry Pi Model 3 B
lying around. This model is from 2016 and has 1GB of RAM.
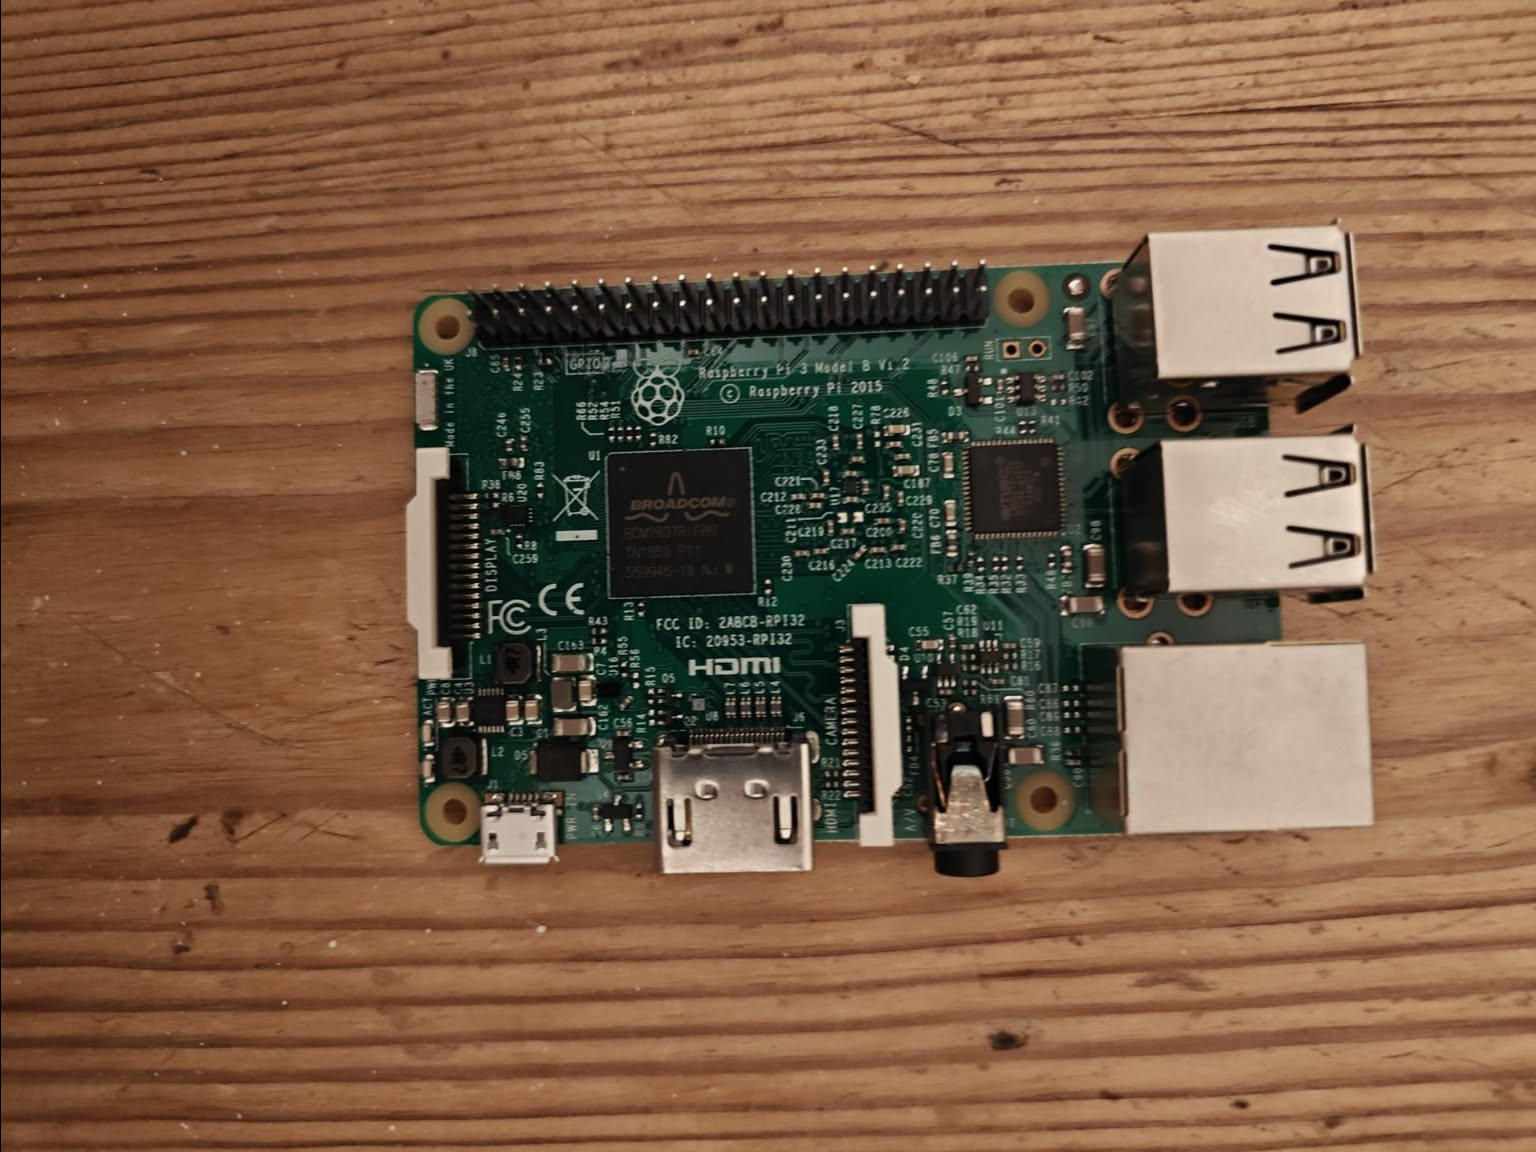 I purchased a memory card and flashed Raspberry Pi OS
lite onto it using the raspberry pi imager tool.
I had trouble getting wifi working on the pi, I think it’s something to do with 5GHz not being supported on this model but in the end I thought that a server is probably better wired so I plugged it into my router via ethernet.
Initially I thought of deploying using a docker image but I didn’t really want to rely on docker so I went with a simple systemd service that I deployed using scp and ssh.
I then did something that I haven’t done before, expose a port publicly on my router. I think I did this fairly safely, from the router user interface, I made a firewall rule for TCP port 1965 and routed traffic to that port to the pi and gave it a static IP. There we go I had joined the Geminispace!
The result
What I made was a basic TODO application. I’m not sure it has much practical usage with all the fully featured todo list applications available, but it was a fun to make. You can visit it in a gemini client by going to gemini://todo.willmunn.xyz. The source code is available on codeberg.